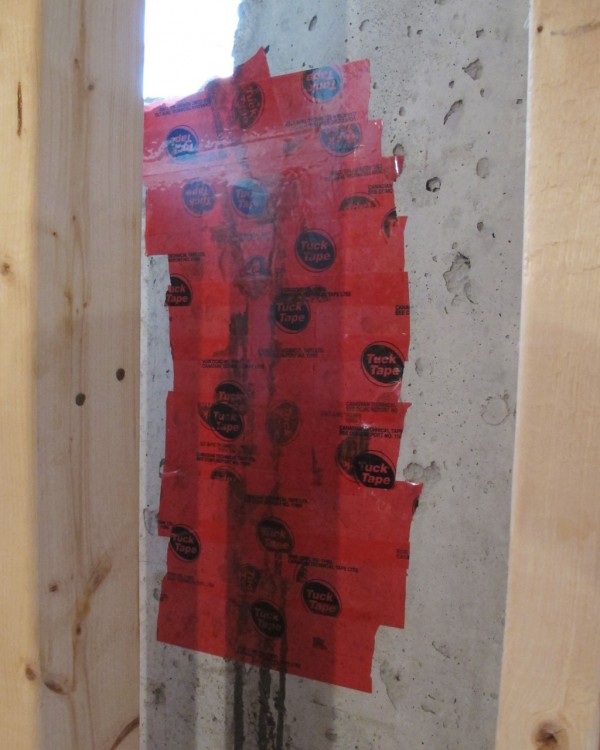
 August 31st, 2014 I carefully checked the result from our last epoxy injection, and I found that the top part of the crack did not seem to be fully filled. It seems that that the epoxy have flown down the crack and accumulated at the bottom. So the bottom part of the crack is very nicely bounded and sealed while the top still seem to have some space. So we decided to do another round of epoxy injection just on the top three holes.
So we did the same drill as last time. We taped up the top three holes using tuck tape. Then we start to inject epoxy from the bottom hole let the epoxy rise up until it flows out of the hole above. Then we tape up the lower hole and move up.
Continue reading ‘Foundation wall crack repair – part 2’ »
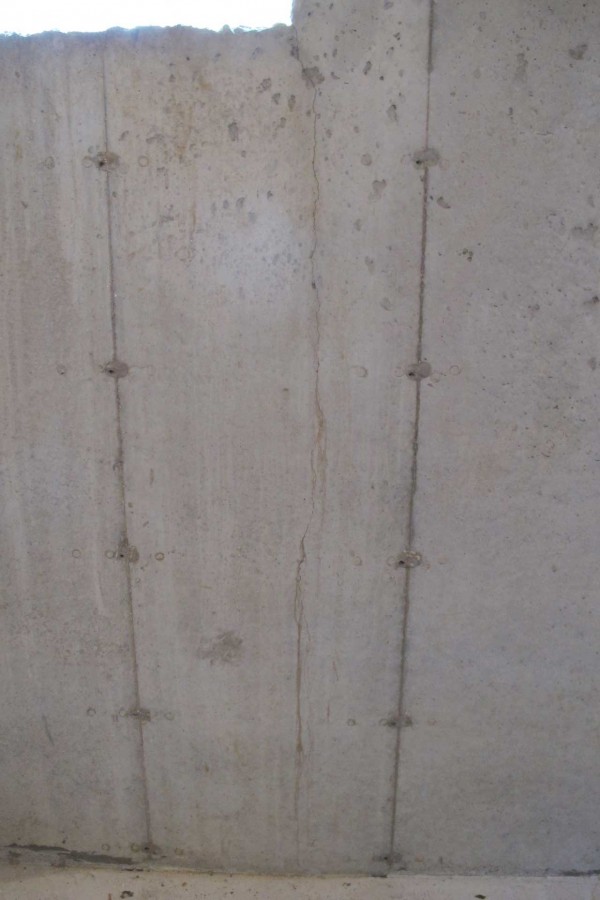
 August 19th, 2014 I just found out recently that I still ended up with a crack on my foundation wall. This is a classical case of hairline crack in the foundation wall for poured concrete. It is located right at the window opening, it is vertical and goes straight down.
Continue reading ‘Foundation wall crack repair’ »
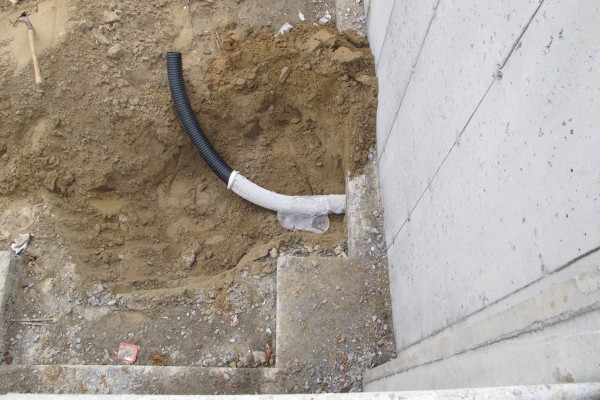
 December 6th, 2013 Today the job is to complete the back fill while tie up a few loose ends. First of all, as indicated in yesterday’s More plumbing issue post, the weeping tile will have to come into a sump pit inside the basement. So the Tony Cantalena and his crew from Lanor Disposal Inc came and dug up the north west corner of the foundation. They cut the weeping tile there, installed a T joint, and threaded the pipe under the footing into my basement.
Continue reading ‘Back fill completed’ »
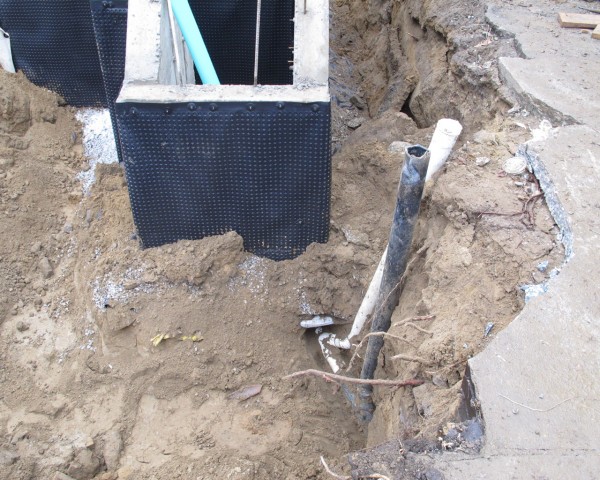
 December 4th, 2013 Today the excavation crew came back for back fill. The first thing they did was to dig out the sewer connection. So as it turns out, even though there’s a white and a black cleanout, I don’t actually have a separate storm connection and a sanitary connection. Instead I have a single sanitary connection. According to my plumber, the black cast iron pipe was used in the past as a breather. But the white PVC pipe somehow a cleanout going towards the house? This part confuses me a little bit.
Continue reading ‘Back fill’ »
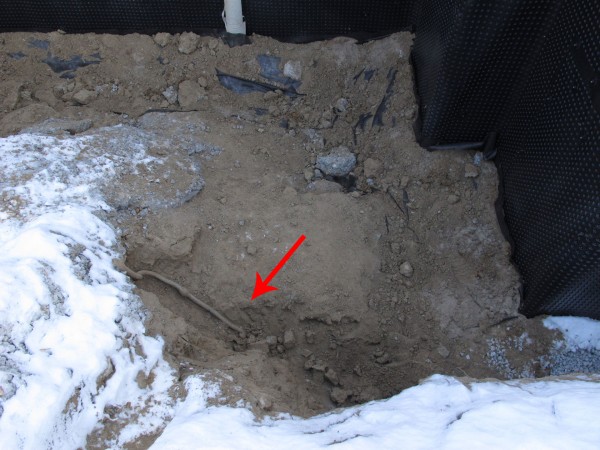
 December 3rd, 2013 Having a little plumbing issue. First of all the water service pipe was buried by the excavator. When I eventually dug it up based on my photos, it is discovered that it was an really old 1/2″ lead pipe. So I have decided not to reused the existing water service connection and request a new connection from the city. However, this means extra cost. As of 2013, City of Toronto charges $2700 for a new 3/4″ connection and $3111 for a new 1″ connection. I’m probably going to apply for a new 1″ connection since there’s not that much difference and it’s probably better to be prepared for the future. But none the less, it’s an extra $3000 that I didn’t want to spend.
Here’s a photo with an arrow pointing at the 1/2″ lead water service connection.
Continue reading ‘Plumbing update’ »
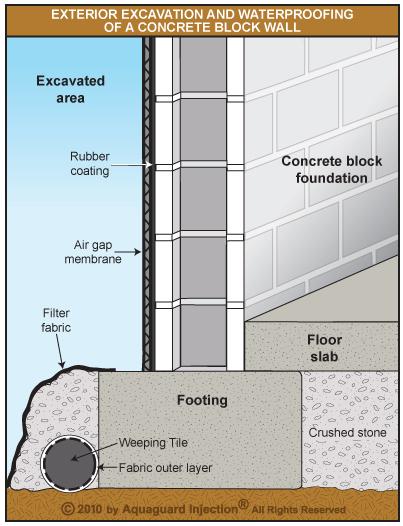
 November 29th, 2013 In my previous post Foundation wall water proof, you can see that the weeping tile is installed. The weeping tile which is a 4″ perforated pipe has white fabric sock around it to prevent sediment from entering the weeping tile. Then the weeping is buried in a pile of 3/4″ clear gravel. Gravel also filters sand and sediments from water and it provides a good drainage backup to the weeping tiles in case the weeping tile system is clogged. Now to maintain that good drainage property of the gravel, it is a best practice to lay a layer of filter fabric around the gravel so that sediments doesn’t enter the gravel layer and therefore maintain that good drainage of the gravel layer.In fact the ideal installation would be lay the filter fabric down first, and put a thin layer of gravel down. Then put the weeping tile and pile a thick layer of gravel on top. And finally wrap the filter fabric around the gravel before back fill.
Continue reading ‘Improving the weeping tile installation’ »
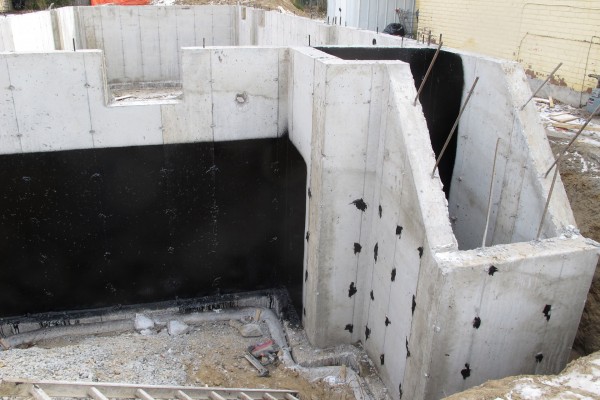
 November 25th, 2013 The crews from Lee Rocca Forming Ltd is here working on the foundation wall again. Today they are doing water proofing of the foundation wall.
First they applied an asphalt spray coating to the outside of the living space of the foundation wall. The part you see that didn’t have the asphalt spray applied is the stair foundation wall. Every inc of wall that’s adjacent to living space has the asphalt spray applied. Asphalt spray is not considered as a water proof solution. It’s only a damp proof solution because the asphalt does make the concrete less porous, but asphalt lose its effectiveness as it emulsifies.
Continue reading ‘Foundation wall waterproofing’ »
 November 23rd, 2013 I got back on site yesterday too later and light’s fading away so I can’t really inspect the foundation wall. Today, is Saturday and not a working day so I got out and took a closer look at what has been completed so far.
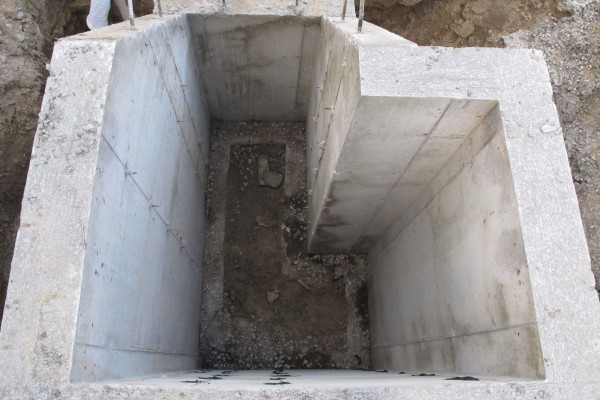
This is a view from the top of my foundation wall into my front concrete stair foundation. The stairs are one piece connected with the house and the stairs are just as heavily reinforced with rebar as the rest of the foundation wall. You could have a cold storage room in here, but this space is just too small and I don’t want to have a break in my thermal envelop in the basement.
Continue reading ‘Foundation wall update’ »
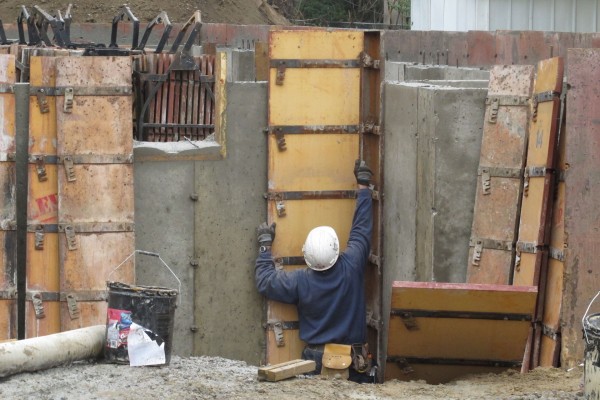
 November 22nd, 2013 Today a smaller crew is here to remove all the wood support around the form and the forms itself form the foundation wall. They started removing it panel by panel by hand on the inside of the foundation wall.
Continue reading ‘Removing foundation wall forms’ »
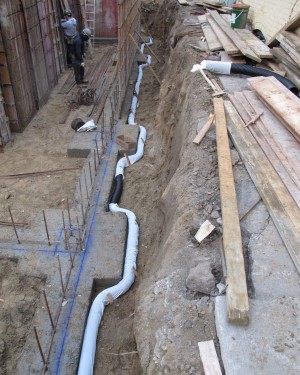
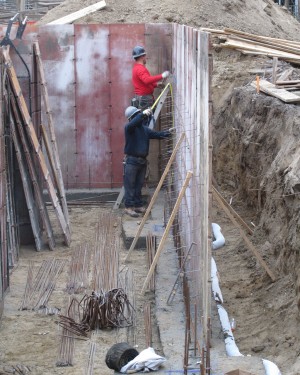
 November 21st, 2013 Today the crew from Lee Rocca Forming Ltd continued on their work to form the foundation walls. They first laid out the foundation weeping tiles around the perimeter of the footing. Then they started to work on forming the walls. The foundation walls on this house is a poured concrete wall and are heavily reinforced with rebars.
Continue reading ‘Forming the foundation wall’ »
|
|


